FREE DOMESTIC SHIPPING ON ORDERS $99+ | 100% SATISFACTION GUARANTEED
FREE DOMESTIC SHIPPING ON ORDERS $99+ | 100% SATISFACTION GUARANTEED
A column with no settings can be used as a spacer
Link to your collections, sales and even external links
Add up to five columns
A column with no settings can be used as a spacer
Link to your collections, sales and even external links
Add up to five columns
Add description, images, menus and links to your mega menu
A column with no settings can be used as a spacer
Link to your collections, sales and even external links
Add up to five columns
Add description, images, menus and links to your mega menu
A column with no settings can be used as a spacer
Link to your collections, sales and even external links
Add up to five columns
Add description, images, menus and links to your mega menu
A column with no settings can be used as a spacer
Link to your collections, sales and even external links
Add up to five columns
Add description, images, menus and links to your mega menu
A column with no settings can be used as a spacer
Link to your collections, sales and even external links
Add up to five columns
Miss Plan It Christmas Decor DIY
December 09, 2016 2 min read

Get into the Christmas spirit with this beautiful DIY centerpiece
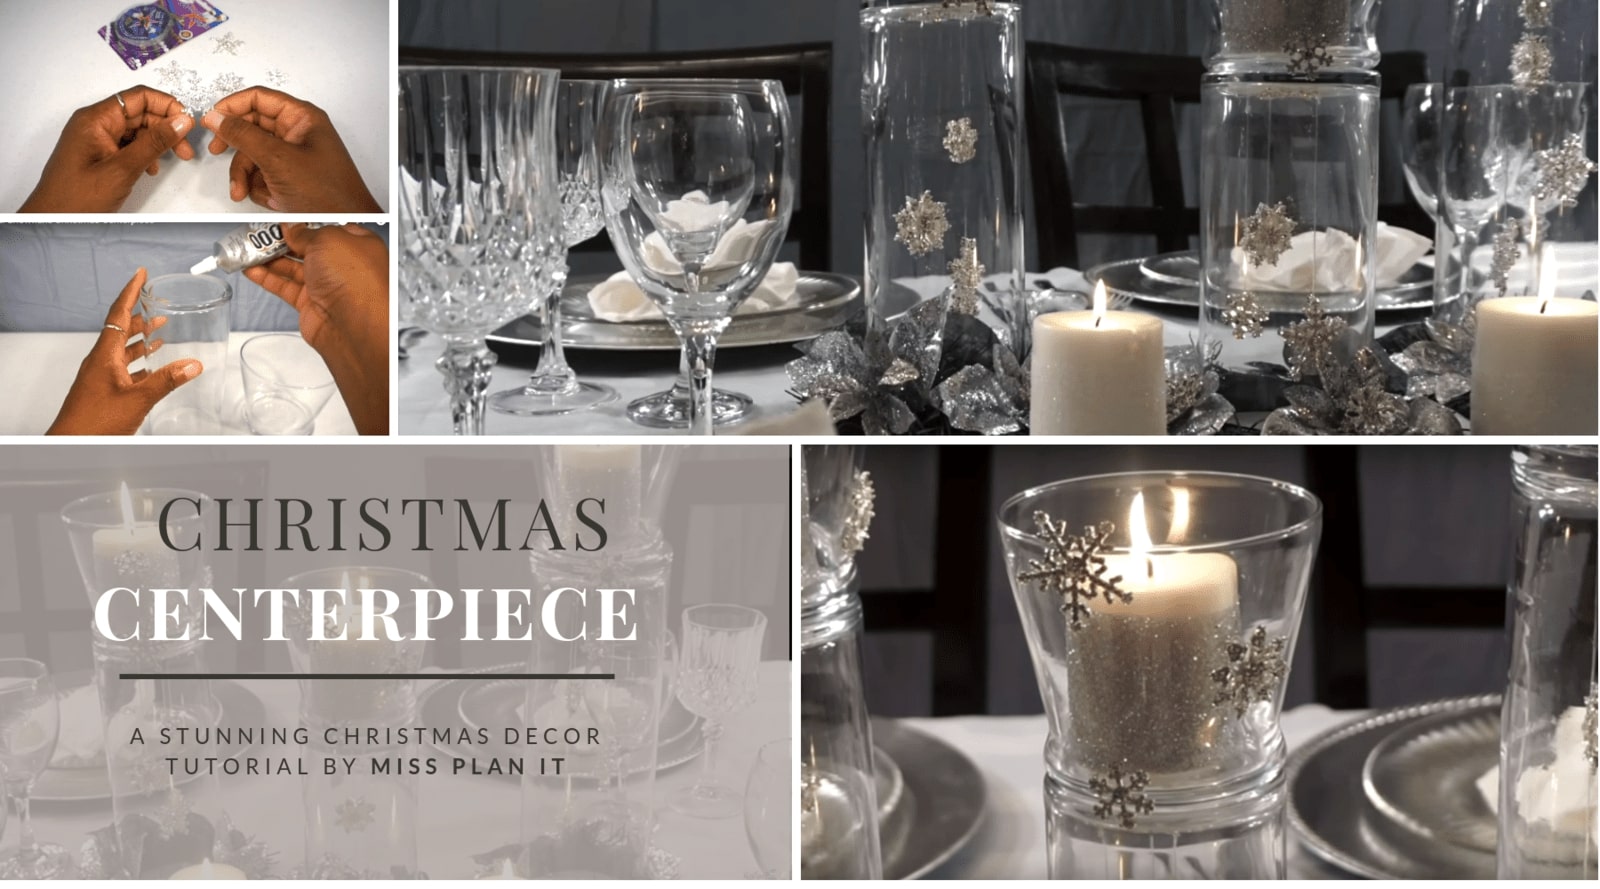
It's nearing Christmas time and the holiday cheer is on with a new decor video tutorial from Miss Plan It. This Christmas centerpiece is so pretty and the step-by-step instructions in this video make it super simple to follow and very easy to make.
Trying to find the perfect Christmas decorations for both your tree and your table can be quite a daunting task this time of the year. Not only are the shops packed and almost impossible to navigate, the prices are almost always pushed up as well. Miss Plan It tackled this problem head on in her video tutorial, making it her mission to create a spectacular centerpiece that doesn't break the bank and I have to say, she did an excellent job.

The color palette for this tutorial is silver and white with plenty of glitter and bling, inspired by the snowfall many states get this time of year. Using the jars made for the tuxedo sweets and treats table and a selection of our snowflake embellishments, she created a gorgeous snowflake mobile which gives the project a lovely depth. I love that these jars were repurposed. Not only does this breathe new life into projects, ensuring that nothing goes to waste but it also saves time and money in the long run.
These pretty snowflake mobiles also double up as candle holders and Miss Plan It takes us through creating silver glitter candles to top the project off and create the perfect Christmas centerpiece. Another very pretty feature of the centerpiece is the wreath and silver poinsettias placed at the base. Miss Plan It has used all silver pieces but you could use red poinsettias if you preferred. We love the silver, though, it adds just a little extra Christmas sparkle to an already stunning centerpiece design.
Take a look at the snowflake Christmas centerpiece video tutorial
Gluing the snowflake pieces to the inner base of the vase can be a bit tricky, however, the effect it creates is absolutely gorgeous and so worth the extra time spent holding the snowflake mobile in place. It's a great idea to play around with the snowflake pieces to get a seamless and layered look to your snowflake mobile. In this tutorial, Miss Plan It used all three size snowflakes interchangeably.
Shop The Rhinestone Products Miss Plan It Used in This Tutorial
Connect With Miss Plan It
Get in touch with Miss Plan It and chat to her about her beautiful Christmas Centerpiece tutorial. She has a variety of stunning decor DIYs that she has shared across Facebook;Twitter; Pinterest; Google+; her Blog and Instagram and, of course, her Youtube Channel.


