FREE DOMESTIC SHIPPING ON ORDERS $99+ | 100% SATISFACTION GUARANTEED
FREE DOMESTIC SHIPPING ON ORDERS $99+ | 100% SATISFACTION GUARANTEED
A column with no settings can be used as a spacer
Link to your collections, sales and even external links
Add up to five columns
A column with no settings can be used as a spacer
Link to your collections, sales and even external links
Add up to five columns
Add description, images, menus and links to your mega menu
A column with no settings can be used as a spacer
Link to your collections, sales and even external links
Add up to five columns
Add description, images, menus and links to your mega menu
A column with no settings can be used as a spacer
Link to your collections, sales and even external links
Add up to five columns
Add description, images, menus and links to your mega menu
A column with no settings can be used as a spacer
Link to your collections, sales and even external links
Add up to five columns
Add description, images, menus and links to your mega menu
A column with no settings can be used as a spacer
Link to your collections, sales and even external links
Add up to five columns
DIY Chair Sash Tying
May 19, 2017 2 min read

Make your own elegant chair sashes with this easy side knot
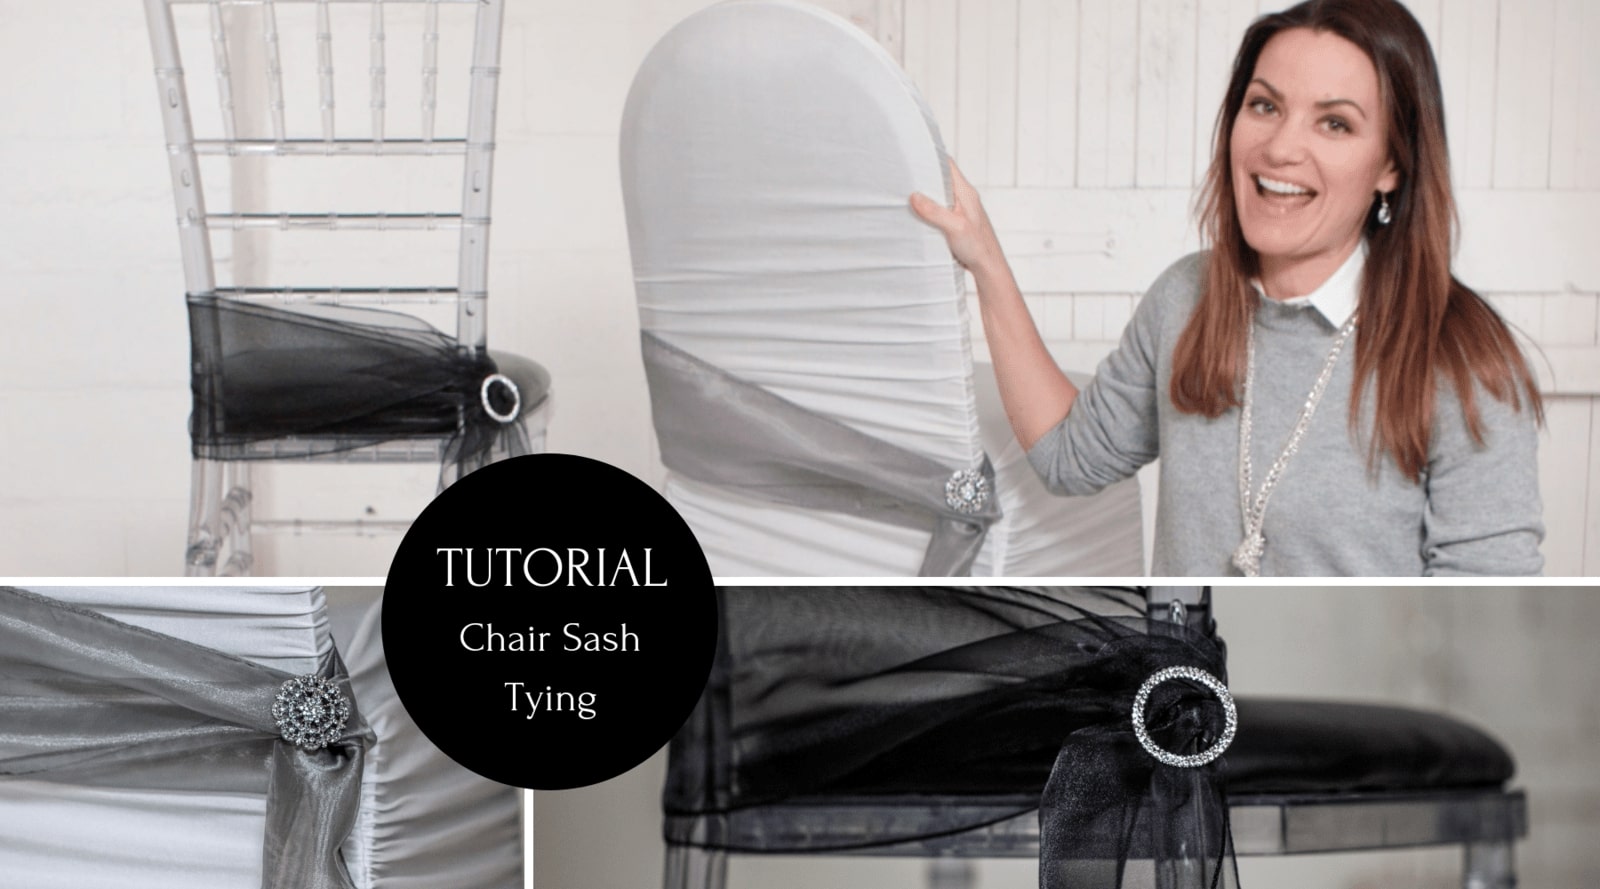
The tutorial for this gorgeous side knot chair sash is probably one of the quickest I've uploaded thus far on the Totally Dazzled Youtube Channel. Not only is it a quick DIY, it's super elegant and gloriously versatile. This is another of those night before DIYs and it's great for large weddings where time is of the essence and every second spent putting together DIY projects is precious.
For the video, I've made use of a black organza sash, which I've used on the Chiavari chair to tie the design together, I've simply attached a flower rhinestone and pearl brooch to add that special bling touch. I also made use of a silver-gray organza for the banquet chair and used the diamante flower brooch to tie it all in. You can make use of any color sash as well as any type of material to achieve the look you're going for.
Watch the tutorial
In order to make these DIY chair sash ties you'll need:
- a length of organza or fabric in the color of your choice
- Your choice of bling brooch or buckle slider
- A chair
Simply fold your organza in half and wrap it around your chair (folded in half.) Pull the organza through the end of the fold and tighten. That's it. It's literally that simple to create this beautiful side knot. Not having to rely on glue, sewing techniques or other ways of fixing the sash to the chair leaves room in your budget for important items.
Although I often focus on weddings and large events in these DIY tutorials, all of these projects could just as easily be used to glam up your home, office space or creative studio. I tend to lean towards DIYs that can be whipped up in a minute or two, opting for easy to use and cost effective supplies in each tutorial.
Quick Ideas
The simplest way to change the look and feel of this gorgeous chair design is to adjust the height and position of the chair sash.
Incorporating different rhinestone products into your design will also produce very different results. I made use of the flower rhinestone brooch as well as the circle slider buckle in order to illustrate how this simple detail can make a huge difference to the design, despite using the same fabric and chair.
Adding a touch of sparkle just takes this already stunning chair sash design totally to the next level. You could get creative and add finer details that suit your theme too. consider using a different type of fabric for your chair sash. Why not use more than one bling brooch to add a little extra sparkle?
If you wanted to get really creative, why not experiment with more than one chair sash? Combine two or more colors to create a bright spring-themed wedding chair. Add a feather, flower or a string of pearls to the design to add character to the chair.
Shop the Rhinestone Products we used in the making of this chair sash


