FREE DOMESTIC SHIPPING ON ORDERS $99+ | 100% SATISFACTION GUARANTEED
FREE DOMESTIC SHIPPING ON ORDERS $99+ | 100% SATISFACTION GUARANTEED
A column with no settings can be used as a spacer
Link to your collections, sales and even external links
Add up to five columns
A column with no settings can be used as a spacer
Link to your collections, sales and even external links
Add up to five columns
Add description, images, menus and links to your mega menu
A column with no settings can be used as a spacer
Link to your collections, sales and even external links
Add up to five columns
Add description, images, menus and links to your mega menu
A column with no settings can be used as a spacer
Link to your collections, sales and even external links
Add up to five columns
Add description, images, menus and links to your mega menu
A column with no settings can be used as a spacer
Link to your collections, sales and even external links
Add up to five columns
Add description, images, menus and links to your mega menu
A column with no settings can be used as a spacer
Link to your collections, sales and even external links
Add up to five columns
How to Tie a Chair Sash - The Angled Bow Method
December 03, 2018 2 min read
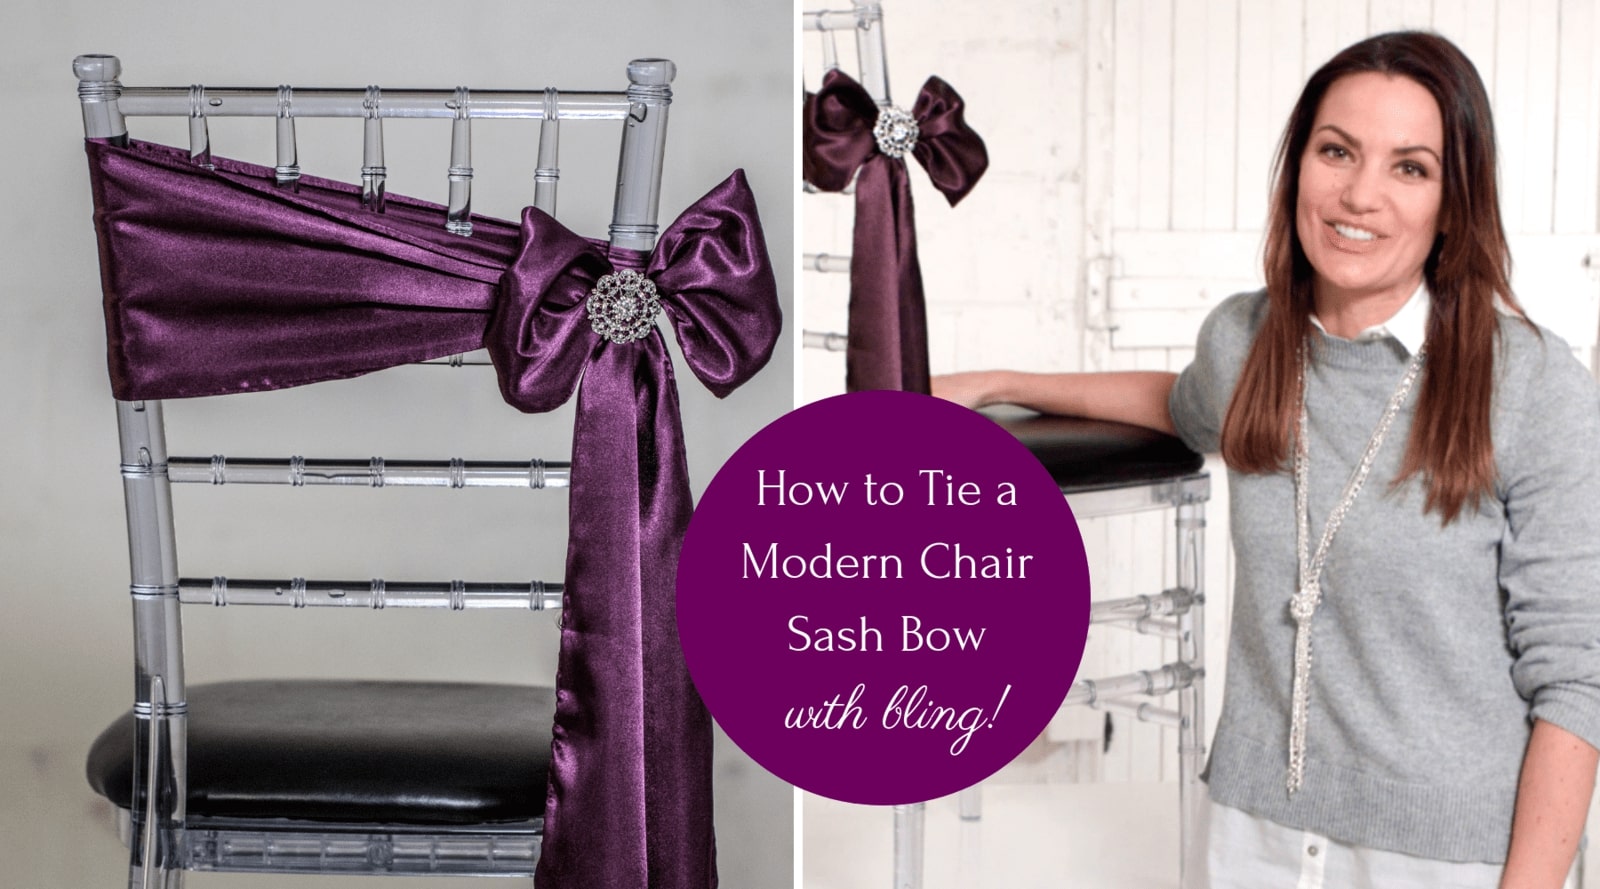
Make your own chair sashes stand-out with this gorgeous angled chair bow method
Today's tutorial is another super simple DIY that I'm really excited to share with you. The end result looks amazing and the fact that it takes little to no time to create is a huge bonus. The angled chair bow, or knot, is completed in just a few steps and it's a no mess, no-sew tutorial, making it perfect for the event planner who wants to re-purpose the materials needed to make these chair sashes.
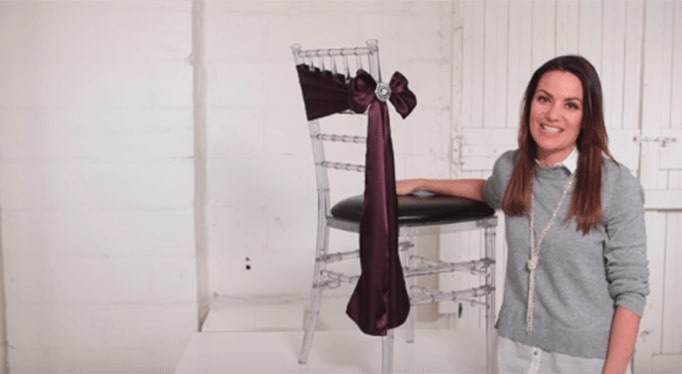
In addition to these chair sashes being incredibly easy to create, they're also customizable. Factors to take into consideration in order to change the look and feel of your bow are color choices, ribbon widths, fabric type, choice of bling, and lastly, whether you'd want to tie a knot or a bow.
WATCH THE TUTORIAL
In order to make this DIY angled bow chair sash tie you'll need:
- A length of organza or fabric in the color of your choice
- Your choice of bling brooch or buckle slider
- A chair (I've used a chivari chair)
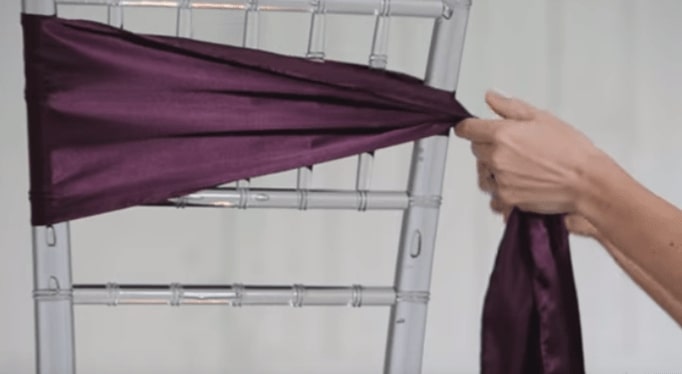
Simply fold your sash in half in order to find the center point. From there, use that center point to wrap around the corner of the chair and pull your ribbon asymmetrically down towards the bottom of the chair back. Tie a knot from the side and then make a bow.
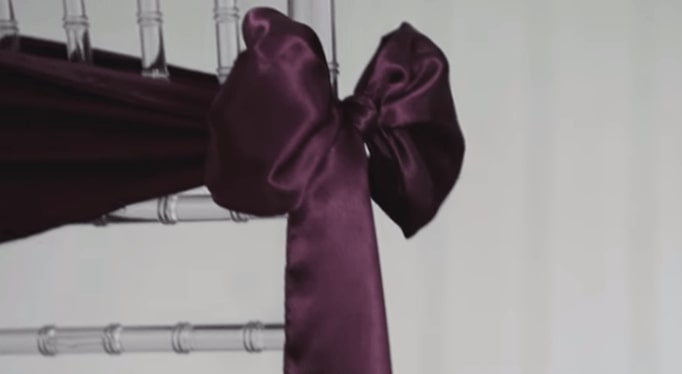
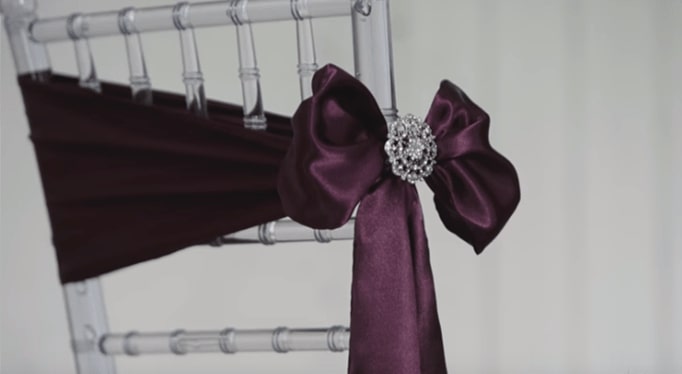
From here you can leave the asymmetrical chair sash as is in a pretty knot and simply add some bling for that extra wow factor. I've used the popular bling brooch in this tutorial where it adds dimension to the design in just a few easy steps. This is a cost-effective way of adding a touch of elegance to your chairs and as you'll simply be tying the buckle to your chair sash, you could re-use it as a bling piece on another project.
Quick Ideas
Possibly the easiest way to change the look and feel of the angled bow chair sash is to use a different type of fabric. Organza is a great option for weddings. Fabric like tulle, burlap, and lace could also work very well. Of course, you could play around with any fabric type and even fabric combinations to get the look and feel you're going for.
The sky is the limit when it comes to the type of embellishment you want to use on your angled chair bow sashes. I've opted for something simple but if you'd like to add an extra sparkle you could even use two or more items. Consider adding in a flower or two if you're making use of the knot version.
SHOP THE RHINESTONE PRODUCTS WE USED IN THE MAKING OF THIS ANGLED CHAIR SASH
